I have been making the Mandala Madness by Helen Shrimpton since October 15th 2017, though not continuously :) It is such a lovely pattern and I am learning so much.
I am a third of the way in and absolutely loving it and there is a Facebook page for Helen's Hookaholics showing all manner of lovely Mandalas
Monday, 8 January 2018
Tuesday, 21 February 2017
Back to blogging
It has been a while since I have blogged, but have decided to start up again, though in a slightly different format.
I will include details about the group get together's I run, show what people have made and generally keep people up to date with when the next one is on.
That next date is 4th March from 9am - til 6pm, there is a £20 fee for the day, which includes a fabulous lunch from the local Turkish restaurant, copious amounts of tea and coffee and some good company.
Then there is another booked on the 18th March.
If you need help with something, I'm hoping to be able to help, though I'm self taught, if I don't know, I can probably find out.
I do need to know if you plan on attending, so I can make sure I have enough tables for everyone.
This is what I'm working on at the moment - not sewing I know, but still crafting and I needed a sitting down not doing much project, so this was it.
I will include details about the group get together's I run, show what people have made and generally keep people up to date with when the next one is on.
That next date is 4th March from 9am - til 6pm, there is a £20 fee for the day, which includes a fabulous lunch from the local Turkish restaurant, copious amounts of tea and coffee and some good company.
Then there is another booked on the 18th March.
If you need help with something, I'm hoping to be able to help, though I'm self taught, if I don't know, I can probably find out.
I do need to know if you plan on attending, so I can make sure I have enough tables for everyone.
This is what I'm working on at the moment - not sewing I know, but still crafting and I needed a sitting down not doing much project, so this was it.
Tuesday, 6 January 2015
#ukminiswap
Happy new year to everyone!
I've signed up to the #ukminiswap this year, first time and I'm quite excited about it.
I've made a couple of collages of what I like.
I've signed up to the #ukminiswap this year, first time and I'm quite excited about it.
I've made a couple of collages of what I like.
![]() |
#ukminiswap |
![]() |
#ukminiswap |
While perusing the web for ideas, I have come to the conclusion that my tastes are all over the place, what I used to love, I still do, but I've added so much more to my taste, I use colours I never thought and it's rubbing off in what I wear as well.
If any of the photo's above belong to you, my apologies for not making a note of who you are to give you credit, but just so you know, you're stuff is great and I hope you don't mind me showing it off on here.
Tuesday, 2 December 2014
Purse tutorial
Well I have finally written my first tutorial and I have a lot more respect for others that have done it, it takes time and effort.

Purse / Wallet
Cut as follows – all measurements in
inches.
1 piece 14 ½ x 10”, this will be the
outside piece
1 piece 13 ½ x 9, this will be the
inside piece
1 piece of wadding 14 ½ x 10
Sandwich the pieces and quilt – any
sort of quilting is fine, so long as it’s heavy and close together. I did a
grid ¼” apart. If you chose to do a grid, make sure you alternate the ends that
you sew from, unless you use a walking foot, which I understand stops the
fabric from moving, but I’ve yet to work out how mine works!
Cut to the smaller piece, fold into
three and iron.
Next are the
card pockets, cut 8 pieces 4” x 5”, fold right sides together and with the raw
edges at the top, sew along the left side. One of the eight you will need to
sew along the long raw edge, this will be the bottom pouch. When you’ve done
all eight, fold out and iron. Place these along the right hand side, evenly
spaced, the sewn edge will be on the left and the raw edges on the right and
bottom.
You will
then need to sew the bottom of each of them, starting from the top one, keep
checking the left edge to make sure they line up, once that is done, sew down
the left edge, you then need to put a card in the top pocket to find your right
hand sewing line, you want them snug so they don’t fall out.
Receipt
pocket.
Cut a piece
8 ¾ x 9 fold right sides together along the 9” edge, sew along both sides and
most of the top, leaving a gap to turn through, clip the corners and turn
through, fold in the opening and iron, lay on to the middle section to check
the measurements, if it fits to about a ½ inch to the edges it’s perfect. You
then need to sew the Velcro fastenings on, when the pouch top is layed on, mark
the middle of both pieces and sew the Velcro on both sides, I would have the
Velcro opening on the left hand side, once both pieces sewn on, lay the top
part on and sew along the three sides with no Velcro.
Zippered
purse.
This is a
bit of a fiddly bit.
Having the
extra bits seems to help at the end.
Next cut 2
pieces 8 ½ x 9”, with wrong sides together, fold in half along the 9” side and
iron. Either end of the fold, fold in both pieces ½”

Now turn the
pieces right sides together and sew down the edges not folded in, open out and
press.
No you need to sew it to the back piece in between the receipt pocket and card holder part. Just secure with a straight line down the middle.
Now to insert the zip, tuck into one side and sew near to the edge. Now the tricky part, you need to put the other side of the zip into the other end, I ended up sewing the middle bit, then the ends. I think I ended up using all my fingers so hold it in place, as well as pins.
No you need to sew it to the back piece in between the receipt pocket and card holder part. Just secure with a straight line down the middle.
Now to insert the zip, tuck into one side and sew near to the edge. Now the tricky part, you need to put the other side of the zip into the other end, I ended up sewing the middle bit, then the ends. I think I ended up using all my fingers so hold it in place, as well as pins.
Then sew up
either sides.
For the flap you can either shape it or leave it
square, as I’ve done in this one. Then you need to bind it, I found doing a
separate binding on the edge of the card holder allows you to do a large piece
of binding to cover the raw edges of the card holder, I used an 1 ½” and then
an 1 ¼” for the rest of the binding.
I sewed a
button hole in the flap and then sewed a button on the outside of the credit
card piece, it can be a bit tricky as you have to be opening the credit card
bits and sewing through that.
I'd love to see any that are made, pleased do email me.
Monday, 20 October 2014
Hurrah!!! The quilt is finished
I cannot tell you how glad I am that this quilt is finished, it seems to have been with me for a long, long time - partly due to the fact my machine broke during the making of it, but still I'm glad it's going on Friday.
I am pleased with it, though I procrastinated massively on Saturday when it came time to quilt it - I even decided to clean my flat first (soooo not like me - it's normally the other way around sewing instead of cleaning), as I really wasn't looking forward to it - I've decided I don't like the quilting part - maybe if I basted I wouldn't mind it, but it's just the whole shoving of large quantities of fabric and wadding through the gap in the machine - I didn't actually start to quilt it until the Sunday - how's that for procrastination :o)
I did a bit of free hand letter quilting in the top of it, the little boys name and I stippled in all of the pale blue parts. It's not quilted as much as I would have liked, but I really had reached my fill of it, I think it is enough though, as I want it to be soft for him.
The flags are because his mum is Australian and his dad is English and the cupcake is because the mum has a company called the Cutest Cupcake. In the bunting above the cupcake I've embroidered his name as well.
The line next to the British flag I've take out, as it was making it look weird.
Below are a few of the quilted blocks.
Thursday, 9 October 2014
A couple of Wips
I haven't really been into blogging as of late, though sewing is still very much on-going. I've had two quilts on the go for the last few weeks (well one the last couple of months).
I have been working my way through a foundation pieced quilt and it has been a big learning curve, I've done a few foundation blocks before, but nothing like this and I have become very acquainted with my stitch ripper and on a couple of occasions I have had to just put it down and do something else, but I now have a finished top. The back is ongoing and will have three blocks on it, a Union Jack, an Australian flag and a cupcake, which will be on the top of the back upside down, so it can be folded over and viewed with the other blocks on the front.
This is the finished front and I have to say I am very pleased with it (and glad it's finished)
The below is what I was working on when I had to walk away and it's abut 80" square and I really like it, very girly and pretty fabrics. It just needs sandwiching, quilting and binding.
I have been working my way through a foundation pieced quilt and it has been a big learning curve, I've done a few foundation blocks before, but nothing like this and I have become very acquainted with my stitch ripper and on a couple of occasions I have had to just put it down and do something else, but I now have a finished top. The back is ongoing and will have three blocks on it, a Union Jack, an Australian flag and a cupcake, which will be on the top of the back upside down, so it can be folded over and viewed with the other blocks on the front.
This is the finished front and I have to say I am very pleased with it (and glad it's finished)
This one is a finish and is now hanging in the church, it's been finished about a month, but I didn't get around to photographing it.
I'm now helping the other two women in the sewing group to make a quilt each (from my scraps stash), which we'll raffle off for the church and a children's home that we support in Romania.
Monday, 22 September 2014
Sunday, 14 September 2014
A block finish and a WIP
I finished another animal block for the commissioned quilt - I'm glad the buyer is a patient person - it does seem like a very long process and it's going to be another short wait until payday and then I can get the grey for the Emu, then just the two flags and a cupcake to do and it will be finished, well nearly, then I'll have to put it together and quilt it - which I'm not really looking forward to as I've had no flashes of inspiration yet - maybe it will come later when it's all together.
The finished block is the fabulous Mr Fox.
I've also been working on another low volume quilt, I really liked the last one and I'm hoping this one I'm making will be snapped up by someone, I know they're tempted, she said she loved the small one, so I'm making it in the hope and if she doesn't, well I'll either keep it for myself or save it for a Christmas present. I can't believe that I'm having to think about Christmas presents already and I have to say I'm short on ideas this year.
These are a few of the blocks, I think I've made about 40 so far, they're at 8" square and I have another 40 odd on the go and I'll be making this one with 90 blocks, so nice and big, I recon about 5 1/5' x 6 1/2'.
Tuesday, 26 August 2014
A finish at last
I feel as though it has been ages since I finished anything and this past couple of days I've managed three finishes - two backpacks for my niece and nephew and a quilt to go to Scotland for the Helping Hands - Stitching and sewing for good causes https://www.facebook.com/groups/649634061794753/
I really wanted to have a go at a low volume quilt and I started making up the blocks for this last year, then I sort of ran out of that kind of fabric, so had to wait and build up that box a little and here is the finished result.
I used some Kath Kitson on the back, did a big stipple all over and bound it in a plain lilac and I love it - but with everything I make, I now don't want to give it away, but I will, I will.
I discovered something doing this, sometimes the back gets a bit puckered and as I unpicked a part of it, I realised that the top is always heavier than the front and if I quilt from the back instead, I have a lot more control over the back and because of the weight of the front, I don't need as much, as it pretty much followed suit.
I'm sticking with my no basting, I don't like it, therefore I'm not doing it.... I only hope I don't get to dislike quilting as I'll end up just giving away bits of fabric and wadding and saying make it yourself.. lol
I really wanted to have a go at a low volume quilt and I started making up the blocks for this last year, then I sort of ran out of that kind of fabric, so had to wait and build up that box a little and here is the finished result.
I used some Kath Kitson on the back, did a big stipple all over and bound it in a plain lilac and I love it - but with everything I make, I now don't want to give it away, but I will, I will.
I discovered something doing this, sometimes the back gets a bit puckered and as I unpicked a part of it, I realised that the top is always heavier than the front and if I quilt from the back instead, I have a lot more control over the back and because of the weight of the front, I don't need as much, as it pretty much followed suit.
I'm sticking with my no basting, I don't like it, therefore I'm not doing it.... I only hope I don't get to dislike quilting as I'll end up just giving away bits of fabric and wadding and saying make it yourself.. lol
And here are the little backpack - on the backs of a happy niece and nephew.
His is space and dinosaurs and hers are cats and red fabrics.
Wednesday, 20 August 2014
Growing group
I have certainly not been in a blogging mood recently, with my machine living more in the repair shop than in my home, it's made me a bit grumpy and unsettled to say the least, it's been like my right arm has being missing.
I have managed to do a few blocks when it has been at home and hopefully it is now fixed for the last time, well that problem anyway, I've ended up having the shuttle part that the bobbin holder sits in replaced.
Here is the little group that's grown so far - there are now only three more blocks to do, then I can start assembling it and recoup the money for the machine repairs from what I'm charging for this - it's going to be the whole lot of it and a tad more - perhaps that was the reason I got this commission as my machine was going to break.
I have managed to do a few blocks when it has been at home and hopefully it is now fixed for the last time, well that problem anyway, I've ended up having the shuttle part that the bobbin holder sits in replaced.
Here is the little group that's grown so far - there are now only three more blocks to do, then I can start assembling it and recoup the money for the machine repairs from what I'm charging for this - it's going to be the whole lot of it and a tad more - perhaps that was the reason I got this commission as my machine was going to break.
I'm happy with the little group so far.
Sunday, 3 August 2014
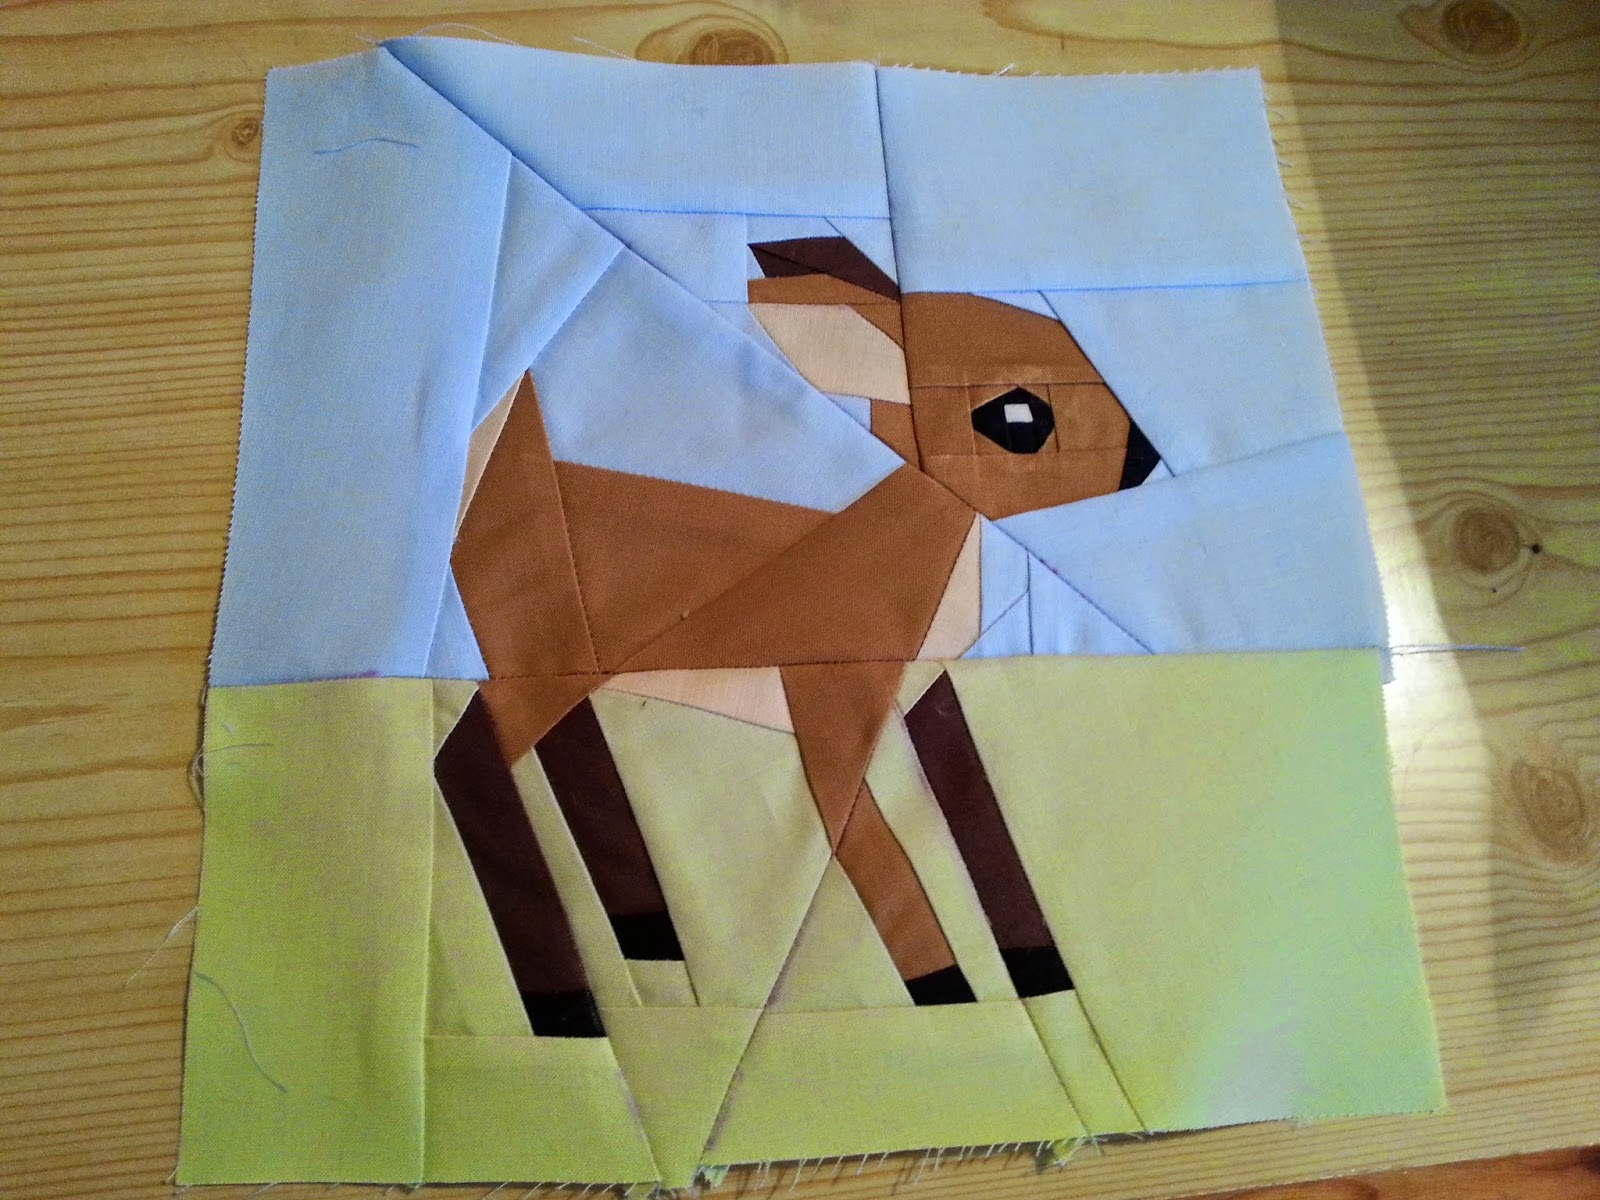
Mr Rabbit is now done
This is Mr Rabbit, a relatively easy one compared to say the owl, but still I had to unpick some of it.
The little group is certainly growing.
Saturday, 2 August 2014
My machine is fixed and home
I have really missed my sewing machine, but it went into the shop when I was on a short holiday with my God-daughter Marlie - we went to Bournemouth for a few days and did Monkey World, which is a sanctuary for the forlorn and abused monkeys, it's a lovely place and it's nice to know that rescue and conservation is their main mission - anyway, I now have my machine back all working ticketyboo and this is the first thing that came off it yesterday.
There are a couple of bits that should have lined up a bit more than they do, but I spent a lot of time with the unpicker from the picture below, there are two differences... can you spot them?
Well there is one of the hind legs in the wrong colour and the bit at the top of the darker brown front leg should have been fawn, but I did it in the green, then I studiously unpicked it, only to sew the same colour in it again, so I unpicked it again and got it right the next time, then I had to put it down as it was annoying me so much.
She just needs the little spots appliqued on her back, then she's all finished.
There are a couple of bits that should have lined up a bit more than they do, but I spent a lot of time with the unpicker from the picture below, there are two differences... can you spot them?
Well there is one of the hind legs in the wrong colour and the bit at the top of the darker brown front leg should have been fawn, but I did it in the green, then I studiously unpicked it, only to sew the same colour in it again, so I unpicked it again and got it right the next time, then I had to put it down as it was annoying me so much.
She just needs the little spots appliqued on her back, then she's all finished.
Monday, 14 July 2014
Paper pieced quilt
Here are the first three finished blocks.
I have noticed that I am needed to add bits to either the top and bottom to make them into 10" square blocks, as no matter what I do they're not coming out like that - I'm sure there is a reason, but I can't find it as of yet. I recon it will be one of those that will become apparent on the last block.
So three made and three more British animals to go and then six Australian animals to make.
First up is Mr Hedgehog - he has had some added bits on the sides.
I had to re-do a big part of this one as it wasn't right - this is definitely a learning curve and patience is going to have to be employed - that is a definite!
Then here is Mr Badger - who also had some added bits.
I have noticed that I am needed to add bits to either the top and bottom to make them into 10" square blocks, as no matter what I do they're not coming out like that - I'm sure there is a reason, but I can't find it as of yet. I recon it will be one of those that will become apparent on the last block.
So three made and three more British animals to go and then six Australian animals to make.
First up is Mr Hedgehog - he has had some added bits on the sides.
I had to re-do a big part of this one as it wasn't right - this is definitely a learning curve and patience is going to have to be employed - that is a definite!
Then Mr Owl, who is made up of 71 pieces! He will need some more sides added and I'm going to have to unpick the top part as the ears don't line up, I thought I could live with it, but I'm not going to be able to.
Friday, 11 July 2014
Paper pieced quilt (in time)
I have been asked to make a quilt featuring Australian and British animals, and after looking on crafty I found two sets of paper pieced patterns from Quietplay who is pretty much the queen of paper piecing, she does have some lovely patterns.
Anyhow, I bought my patterns and have done a fair bit of tracing them out onto greaseproof paper and because my machine has broken, I've not been able to sew any, but I am borrowing one of the ladies from church's sewing groups machine until next Tuesday, so I thought I would make a start.
Here is the hedgehog that I started last night and I have to say I unpicked probably as much, if not more than I actually sewed. Then I made the mistake of having a couple of beers while I was doing it (rubbish day at work's fault) and then just kept sewing the wrong colour in the wrong place, so I decided enough was enough for last night - this is where I am up to.
Anyhow, I bought my patterns and have done a fair bit of tracing them out onto greaseproof paper and because my machine has broken, I've not been able to sew any, but I am borrowing one of the ladies from church's sewing groups machine until next Tuesday, so I thought I would make a start.
Here is the hedgehog that I started last night and I have to say I unpicked probably as much, if not more than I actually sewed. Then I made the mistake of having a couple of beers while I was doing it (rubbish day at work's fault) and then just kept sewing the wrong colour in the wrong place, so I decided enough was enough for last night - this is where I am up to.
Subscribe to:
Posts (Atom)